People say that home grown veg tastes much better than it does from the supermarket, but I never really believed it until I started growing my own tomatoes.
They can be trickier than other vegetables to grow, so if you are just starting out, I would recommend you to read my post, 10 Easiest Vegetables to Grow for Beginners to give you some more ideas
I had no idea there were so many different varieties available in an array of colours and flavours – there’s something for everyone!
Supermarket tomatoes are something I very rarely buy now, I find them bland and unexciting. Some stores stock more unusual varieties but they are very expensive and still not as good as when you’ve eaten them straight from one of your own plants.
Tomatoes can be grown from seed or bought as plug plants. They do benefit from being in a greenhouse but can be grown outside too, if sheltered from too much wind and shade.
Protection from frost is essential for tomatoes – I’ve lost many seedlings because a late frost has caught me by surprise.
How to Grow Your Own Tomatoes:
Interested? Then let’s dive into it:
1. Choose Tomato Varieties
This will largely depend on where you want to grow your tomatoes and how you eat them.
Bush Tomatoes
If you don’t have much ground space, you can grow trailing varieties in hanging baskets or grow dwarf varieties in smaller containers.
Bush tomatoes can be grown in containers, as can cordon varieties but there are major differences between the two.
Bush varieties grow outwards rather than upwards so are quite short. They don’t usually need supporting so don’t need much maintenance.
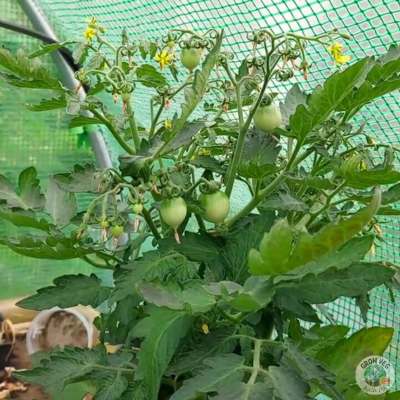
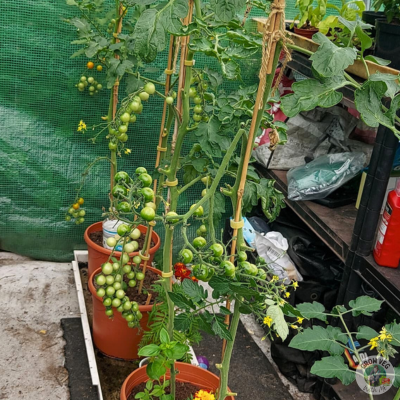
Cordon tomatoes grow much taller, on a single stem (some up to 1.8m tall). Because of this, they require tall supports and need to be tied onto them as they don’t grip on by themselves (like peas do).
There are so many varieties that it can be hard to choose, but I would always recommend to start with one that you know you like the taste of.
It is a good idea to grow a little more than you think you will need because if you’re like me, most of them never make it to the kitchen!
Cordon Tomatoes
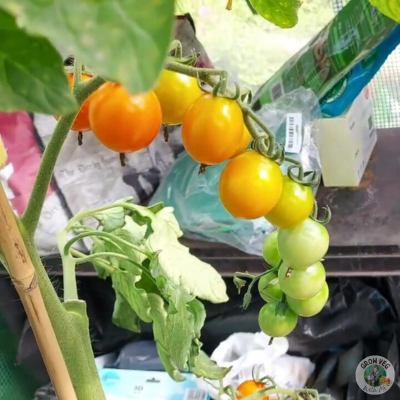
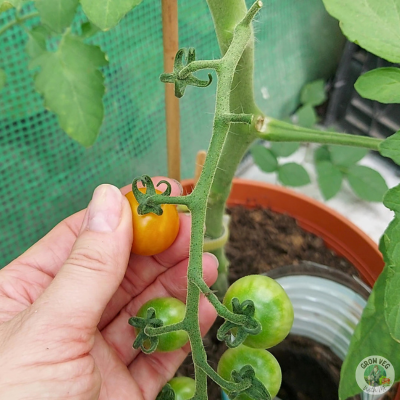
Honeycomb F1 Cherry Tomatoes
My favourites are ‘Honeycomb‘ tomatoes that produce an orange fruit and are super sweet. I also like to grow ‘Rosella‘ tomatoes – both of these are cherry tomatoes but have different flavours. I like to eat them in salads (or straight off the plant!)
It really depends on the type of tomatoes you eat on a regular basis. Larger fruits are great on sandwiches but some are especially good for cooking and making into sauces.
Choose the varieties you know will be useful to you and are less likely to go to waste.
I would definitely recommend reading reviews or watching growers on YouTube to find out the best varieties for your particular needs because you can’t rely on seed packets to give you this information.
I find it best to see the results from someone who has actually grown them instead of just growing what happens to be on sale in your local garden centre.
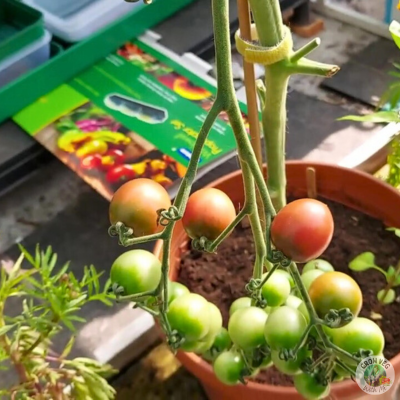
Rosella Cherry Tomatoes
There’s no point in growing tomatoes that look fantastic but they taste just as bland as the supermarket ones. Or really sour tomatoes when you wanted sweet!
Also bear in mind that the bigger tomato is, the less fruit will grow on the plant.
2. Sow Your Tomatoes
Sowing indoors is preferable for tomatoes – they like warm conditions for germination, around 18 degrees Celsius (in my experience anyway).
The time you sow your seeds depends on where their final growing place is going to be.
If you plan to grow your tomatoes in a greenhouse, you can sow them from late February. If you’re growing them outside, then it’s better to sow them from late March to early April.
Otherwise, you’ll end up with big plants taking over your house because it’s too cold to put them outside.
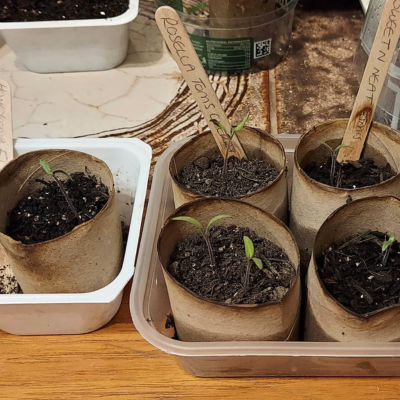
Use small pots or seed cells filled with compost and wet it before you place your seeds on the surface (I use two to each pot or cell). Then cover with a very fine layer of compost (or you can use vermiculite).
Place them on a sunny windowsill or somewhere they can get enough light. A heated propagator can be used or grow lights to improve indoor growing conditions.
If this isn’t in your budget you don’t need to worry – just place a clear plastic bag over the top instead. You could also use a plastic bottle as a cloche by cutting it in half and placing it over your pot.
If they don’t get enough light, your seedlings will grow very tall (leggy) to try to reach it. This isn’t a huge problem, but it makes it a little more difficult when it comes to potting on.
Why not try recycling some of your old plastic and cardboard? I like to use plastic bottles cut in half as pots (I use the bottom half for the pot and use the top half as a cloche). Also, I use cardboard toilet paper rolls to sow seeds in, placing them inside a recycled food container.
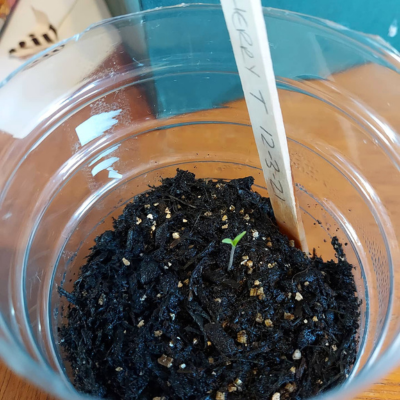
I love it when the seeds germinate and the little seedling pops up!
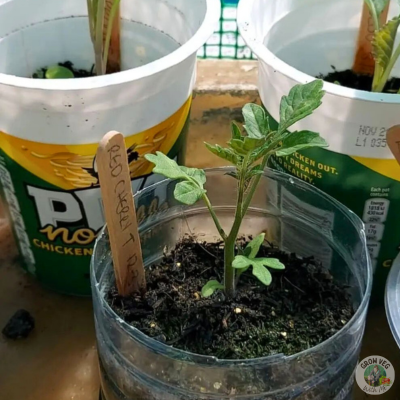
4. Pot On Your Tomatoes
Potting on after a few weeks is necessary if you’ve used small seed cells or toilet paper rolls. It stops the roots getting tangled together and creating a problem later on. Each plant needs its own room to grow and will benefit from a little more space.
It is recommended to pot on when your plants reach around 10cm tall no matter which size pots you sowed into at the beginning.
The roots will have reached the bottom of the container and so a bigger pot allows them to grow even more. More roots equals more tomatoes!
Put some multi purpose compost into the bigger pot, leaving some space and then make a hole in the middle. Holding one of the leaves (not the stem, which is easily broken), use a tool or a pen/pencil to gently prize the seedling up and away from the cell.
Place the seedling into the new pot, making sure the roots are all at the bottom. Add more compost around the seedling, bringing it up to the first set of leaves.
Any part of the seedling’s stem that is under the compost will form roots and that is why it’s not a problem if you have leggy seedlings. You may need to use a deeper pot if this is the case to have enough room for the extra stem and the roots.
Gently press the surface so that the seedling is nice and snug in it’s new pot.
If you have individual seedlings in toilet paper rolls, you don’t need to touch the seedling at all, just lift the paper roll and place it into the centre of the new pot. The paper will eventually rot down and won’t stop the roots or seedling from growing so you don’t need to remove it unless you want to. Gently lifting after watering will release it.
Make sure to water plants regularly and keep them inside at around 16 degrees Celsius or warmer, in a sunny place.
When the seedlings have outgrown their small pots, the potting on process can be done again with even bigger pots.
Around a month after you potted them on for the first time, they should have grown big enough and (hopefully!) the weather will be warm enough so that they can be planted out.
5. Plant Out Your Tomatoes
Only do this when the risk of frost has passed, usually in early Summer.
You could also skip the sowing and potting on process altogether if you buy plug plants from a garden centre.
If you’re growing your tomatoes outside, they need to get used to the colder temperatures first and this is done by a process called ‘hardening off.’
If you have a cold frame or polytunnel, your tomato plants can be placed inside these for 5-7 days.
You can also put them outdoors during the day and bring them back in at night for the same amount of time if you don’t have a polytunnel or cold frame.
After this time, take them out and place them where there is sun, but they are sheltered for another week to fully harden them off.
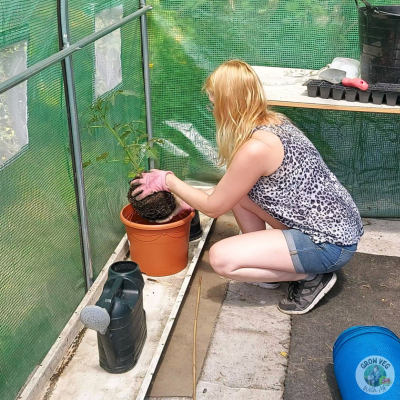
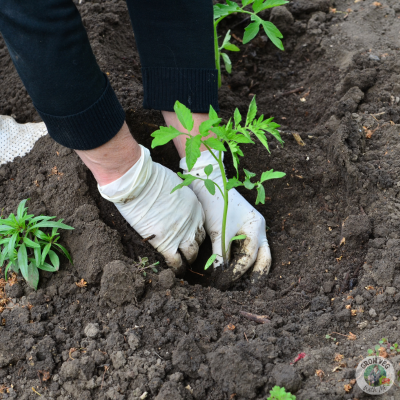
When you’ve done this, your plants should be hardy enough to plant in their final places in the ground. A sunny, sheltered position is best, into ground which has been prepared with garden compost. Space them according to the instructions on the seed packet because all varieties are different when it comes to spacing.
Bury up to the first leaves and lightly press down to firm your plants in before watering.
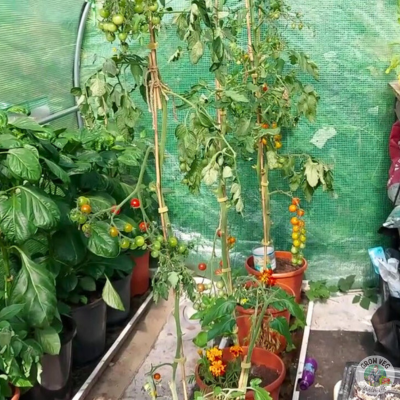
Cordon tomatoes will need a cane inserting next to the plant at this stage, or alternatively you can use another type of vegetable growing structure (see my pinterest board for ideas here).
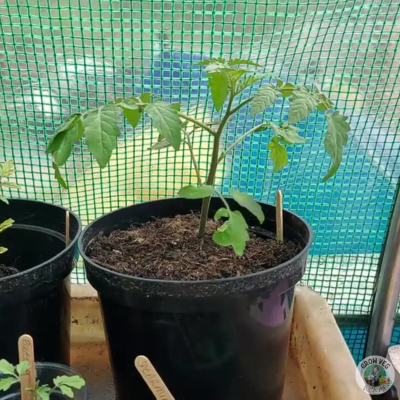
If you’re growing your tomatoes in containers, fill your final ones with multi purpose compost and add canes for cordon varieties. Put them in your sunniest spot outside, making sure they are protected from wind and water them well.
You can use window boxes, hanging baskets or troughs for bush type tomatoes and large pots or growing bags for cordon types.
Ensure your plants have enough room to grow to their full size and still have enough air circulation around them. This can help to prevent blight which is a major issue and will kill your plants before you get to taste any fruit.
Don’t forget to record your sowing and planting out in a garden planner like this one:
They are available to buy on Amazon, click below to see the whole range:
Tomatoes are thirsty plants and need watering regularly, but problems can arise when this is not done correctly so I would highly recommend getting a moisture meter.
Container grown tomatoes dry out fairly quickly in the Summer. Splitting of the skin and blossom end rot are common if the soil isn’t kept moist at all times. Too little or too much water will have a detrimental effect on your plants and their fruit.
If growing inside in a greenhouse or polytunnel, plants won’t benefit from rain water so will need watering more often than those planted outside.
Once you see the first tomatoes on your plants and they have started to swell, it is time to begin feeding them every couple of weeks. They prefer a tomato feed that is high in potassium which you can buy (or you can make an excellent one yourself from comfrey plants).
Tomato plants also benefit from mulching. Spread garden compost or well rotted manure (leaving a gap around the stem) around the bottom of the plants to help keep them free of weeds and allow the soil to retain more moisture.
6. Help Your Tomatoes
Tomatoes are my most needy plants, not only do they require regular watering and feeding, they need some help in other areas too.
If growing indoors, open the door or vents so that pollinators can come in and do their job.
You can also help with pollination yourself by ‘tickling’ the open flowers or gently brushing them with a small paintbrush. Some people spray them with water, whichever method you choose, it is sure to benefit your plants.
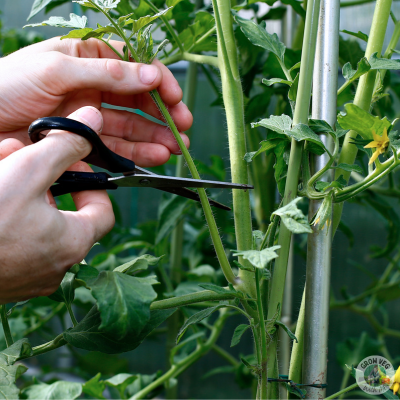
When it comes to pruning, bush tomatoes don’t need any but cordon tomatoes will need to have their side shoots (or suckers) removed whenever you spot them.
They grow between the stem and a branch (the armpit) and grow very quickly if left on the plant. They take away energy from your fruiting branches and also create a much larger plant.
Your cordon tomato plants will need help to support the weight of their fruit as they grow taller.
If you placed a cane beside your plant when planting, use string or ties to attach the main stem to it when it is small and keep doing this as it grows upwards.
I like to use velcro tape because it is wider than string and doesn’t cut into the stem if it gets too tight. It can also be removed and reused the next season. There are also clips you can buy which do the same job and are also reusable (and easier to attach!).
Some growers attach a string to the roof of their greenhouse and then place the end under the plant’s roots as they are planting it in it’s final place. As the plant grows, they gently wind the string around the stem at regular intervals.
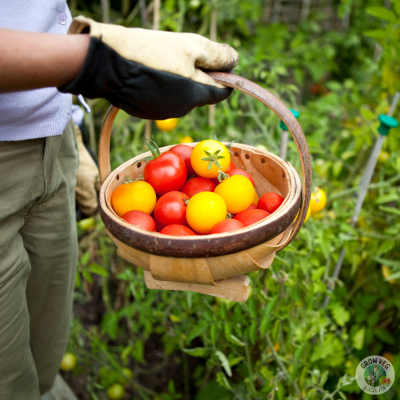
7. Harvest Your Tomatoes
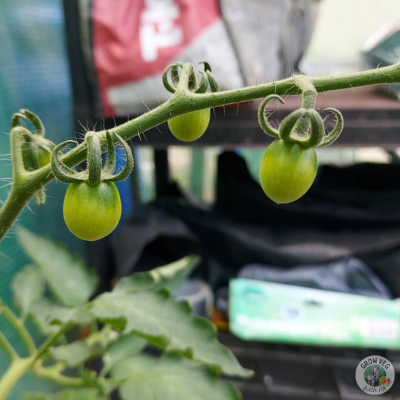
It’s amazing to watch the tomatoes growing on a plant you’ve grown from seed but it’s even more special to taste the fruit straight from it.
The time they are ready to eat will vary depending on the varieties you’ve grown. Cherry tomatoes are ready around mid Summer, but larger fruits will take longer to ripen.
Tomatoes grown in a greenhouse or polytunnel will ripen faster than those growing outside so the best method is to keep checking on them every time you water, picking the fruits as soon as they’re ripe.
Once they’ve been picked, tomatoes are best eaten as soon as possible to have the best taste. However, you can store them for around a week in the fridge. Don’t leave them out or leave them on the plants as they won’t take long to go mouldy.
You can cook or freeze your tomatoes and store them if you have too many. I would recommend doing this if you have them spare so that you can enjoy them through the winter too.
At the end of the growing season, plants may still have tomatoes on them that haven’t had a chance to ripen. Take them off the plants and put them in the dark (but not in the fridge). This will help to ripen them.
Another tip is to put them next to a banana in a dark place, which will ripen them a little quicker.
Tomato Problems:
Sporadic watering of tomato plants can lead to splitting, but also blossom end rot. This can be seen as a dark blotch on the bottom of the fruit.
Dark patches of rot on the leaves and tomatoes is caused by tomato blight. This is more common if the plants are too closely planted and there is not enough air flow.
Mostly seen in greenhouse grown tomatoes is tomato leaf mould.
If I’ve helped you learn how to grow your own tomatoes I’ll be delighted. I highly recommend doing this for the best tomatoes you have ever tasted.
Please don’t hesitate to let me know what varieties you try and how good they are!
I hope you found this post helpful – if you did please leave me a comment below and visit my instagram page and Youtube channel where you can see more of what I’ve been up to.
This post may contain affiliate links. If you click one and make a purchase, I may receive a small commission. This will be at no additional cost to you. You can read our disclosure policy here.