My children love raw carrots and they were my inspiration to grow them at home. We were surprised at how easy it was to get a decent yield.
Not only are they easy to grow, carrots are fun too, especially with all the different colours available (which I had no idea about until I started looking for seeds!).
Our first variety were your standard orange, but when we had our allotment plot we experimented with a multicoloured pack and were amazed to find that each colour carrot had a slightly different flavour.
As with many vegetables, you can sow them successionally from February through to July so that you can have a harvest from May through to October.
Don’t worry if you don’t have a lot of space – carrots can easily be grown in containers as long as they are deep enough.
There are early carrot varieties which can be sown from February and maincrops which are sown later, in around April.
How to Grow Your Own Carrots:
What do you need to do?
1. Choose Your Carrot Varieties
You may think a carrot is just a carrot – a long, orange vegetable and that’s it.
That’s so wrong – but in such a good way!
I grew the standard orange (Nantes variety) which did really well, but I also grew multicoloured carrots. It was a mixed pack and I got purple, yellow and red ones too.
Variety isn’t only in a carrot’s colour. They come in lots of shapes and sizes – very long thin ones, short ones, fat ones, even little round carrots!
It comes down to your preference and growing space. Carrots need to grow deep into the soil unless they are short varieties.
Carrots tend to be quite fussy when it comes to the soil type they prefer to grow in. They like a sandy soil that has good drainage.
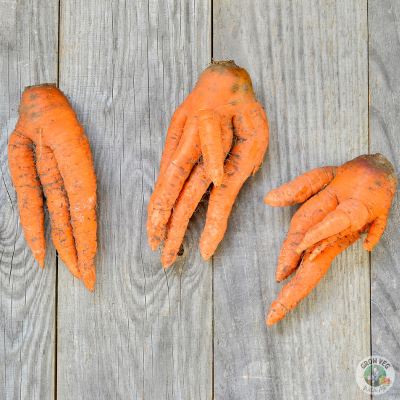
If you try to grow them in a soil with stones or obstructions in it, they will fork as they grow.
What happens is, if they touch a stone or something hard, they stop their growth and send out another root in a different direction.
If that also comes into contact with something, it will happen again, leaving you with lots of roots joined together rather than one long, smooth carrot.
Forked carrots
To combat this problem, I either use multipurpose compost to grow my carrots in or I make sure to sieve my soil thoroughly to avoid any tough pieces.
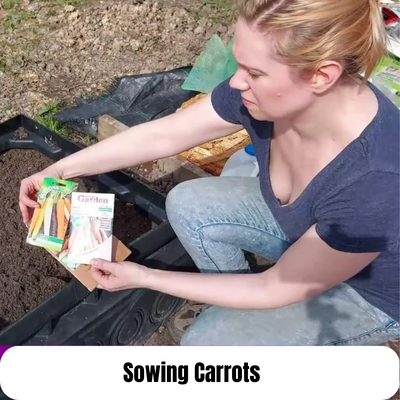
2. Sow Your Carrots
A full sun position is where carrots are happiest.
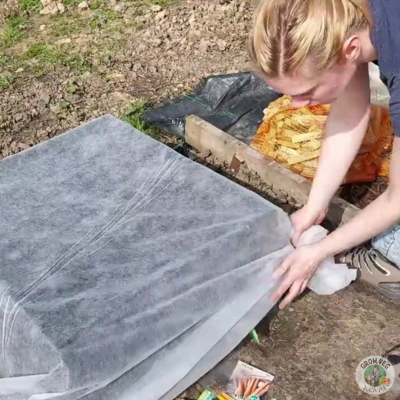
If growing early varieties, you can begin to sow them from February outdoors, but they will need to be covered with fleece or cloches to save them from frost damage.
Maincrop varieties can be sown from April but may still need to be covered, depending on your last frost date. Check the seed packet if you aren’t sure when to sow.
Make sure your soil is fine enough, and if not, sieve it or use multipurpose compost instead – this step is really important if you have rough, stony soil.
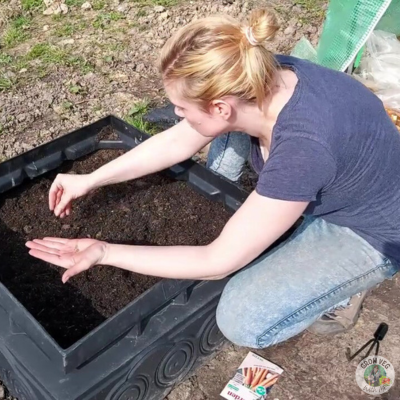
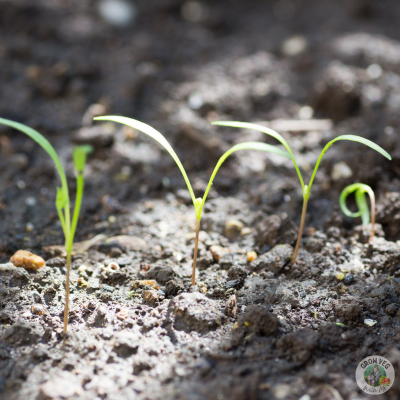
Carrot seeds should be sown as thinly as possible, but it’s not easy because they are so small!
You can always thin your seedlings out when they appear so it’s not something to worry too much about (especially if kids are helping!).
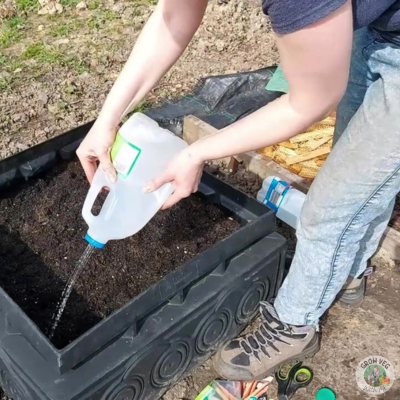
Seeds should be sown around a centimetre deep, in rows around 6 inches apart to allow them enough room to form a nice shape and size. I always sow into dampened soil as it helps stop the seeds moving after sowing.
Cover with more soil and pat down gently, before giving them a good water.
Container grown carrots also need to be spaced well, and it is best to use multipurpose compost, but it might need sieving to remove any obstructions before sowing into it.
3. Thin Out Seedlings:
I really don’t like thinning my seedlings – I always feel like I’m killing the plants that I tried so hard to grow!
After a few seasons of growing carrots, I’ve come to realise that by thinning them out, I’m doing the best for my crop by ensuring they have enough room to mature into the size of carrot I want to harvest.
If you want lots of very thin or small carrots, then you don’t need to thin them as much, but I prefer larger roots. I make sure I remove any extra seedlings so that I end up with the recommended spacing on the seed packet.
When you’ve removed the extra seedlings, move them away from the growing area straight away because the carrot fly will be able to smell them (they are attracted to the smell of the foliage). You can compost them or eat them in a salad so they don’t need to go to waste.
4. Carrot Care:
Protection:
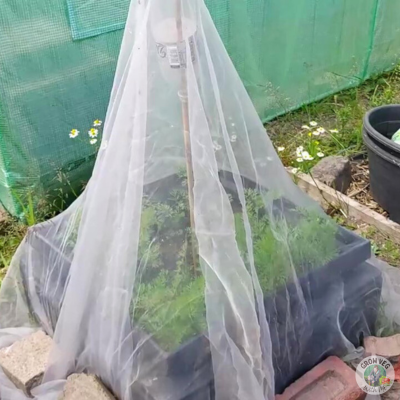
Carrot fly is the main concern here and you may need to use Insect Netting (such as ‘Enviromesh’) to stop the pests from getting to your plants. They are tiny and will be able to get through standard or butterfly garden netting.
However, you can outsmart the carrot fly by placing your carrots in a higher growing position (obviously this is easier with containers) because they can only fly a few inches off the ground.
Enviromesh netting
If growing earlier in the year, you may want to cover your plants with fleece, which will also keep pests away.
Watering:
Usually, carrots don’t need as much watering as other crops, but keep an eye on the moisture levels of their growing area, especially if they are being grown in containers because they will dry out faster.
A good way to check this is with a Moisture Meter (I swear by mine as I tend to be an over waterer!).
Garden Fleece
If they dry out too much, carrots will split and are then susceptible to pests and disease. They will probably be inedible too.
Weeding:
Your carrot seedlings are fragile so it is a good idea to hand weed when they are small to avoid damaging them. As they grow, they will become stronger, but to avoid damaging the precious root, my recommendation would be to continue to remove weeds with your fingers and not with something like a hoe.
This is definitely personal preference – some people are very talented weeders whereas I would describe myself as a ‘clumsy’ weeder!
left to grow, weeds can damage your carrots and cause them to fork while the roots are forming so weeding little and often is the best way to prevent this from happening.
If you have used netting over your carrot plants, replace it immediately after weeding because moving the foliage around alerts any carrot flies to the presence of your plants.
Uncovered carrot plants will benefit from as little touching of the leaves as possible to keep those pests away.
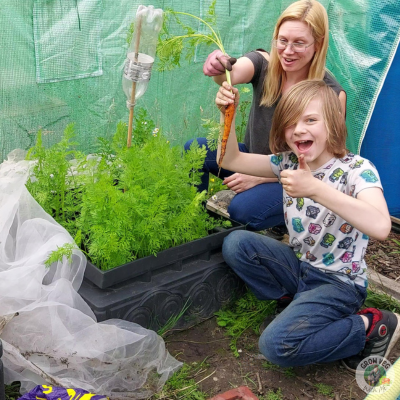
One of the most rewarding moments I’ve ever had when gardening has to be harvesting carrots on our first season as allotment plot holders.
My Son was with me and to be honest, I wasn’t expecting much. I’d set the camera up and was filming for our YouTube Channel.
Having just explained the best way to harvest a carrot, I was concentrating on picking my own carrot. It was a complete surprise when Jacob gasped and I looked up to see him holding up (in my opinion) a perfectly formed carrot.
We were both delighted and had to try not to get carried away and pick them all at once!
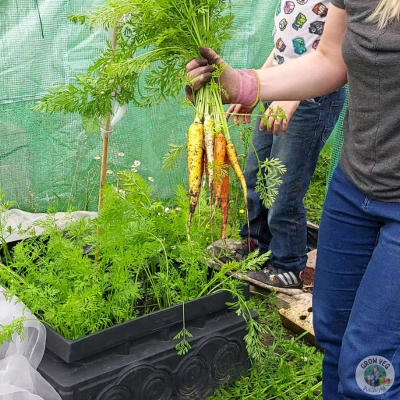
We ate them as soon as we got home and they were the best tasting carrots I’ve ever tried.
The coloured ones (yellow, red and purple) each had their own distinct flavour and it was an experience I definitely wanted to repeat.
Your carrots should be ready around 12-16 weeks after sowing.
Usually, you can see a little of the top popping up above the surface of the soil and this should be an indication of how wide they are (although not how long!). Harvesting them earlier will result in smaller roots, but if you sowed early varieties, they may taste better when small.
So what is the best way to harvest a carrot?
Hold the carrot at the base of the leaves, push it down a little and twist before pulling it up. This way, you should be able to pull it out of the ground whole.
Advice I’ve read is to use a fork, but I find that I’m more likely to stab or break them if I do that so I prefer to pick them by hand.
Try to eat your carrots as soon as possible after harvesting.
If you can, only pick what you need and leave the rest in the ground rather than harvesting more and putting them in the fridge. You can refrigerate them for up to a week, but they won’t taste as good.
5. Storing Your Carrots:
As mentioned above, carrots can be left in the fridge for about a week. They can also be frozen but in order to keep their colour and texture, they need to be blanched first, in boiling water.
If you want to use your carrots in winter, you can leave them in the ground until you need them, but there is a chance they could rot if the weather is particularly wet.
They could also suffer frost damage, so I would recommend placing them under fleece when the cold weather arrives.
If you want to harvest your carrots to store at home, pick them before October time.
Place them on the ground to dry if the weather allows. Then they can be stored in sand, somewhere cool and dark. Your carrots should last for a few months this way.
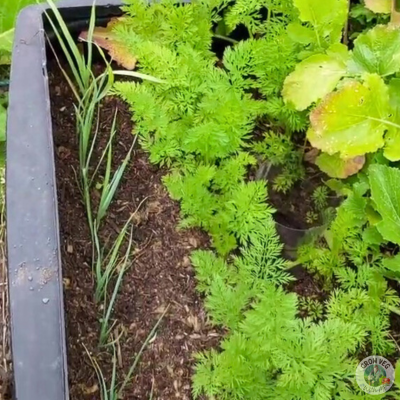
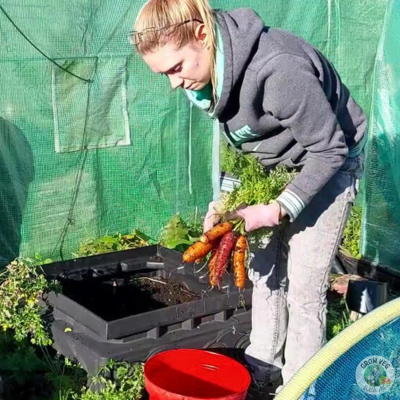
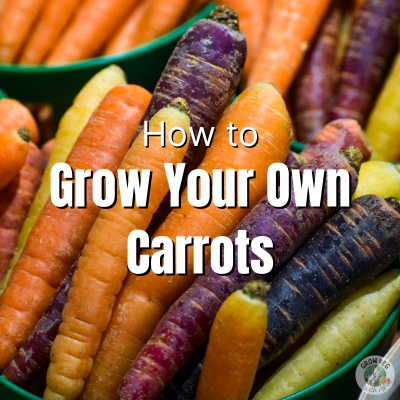
This was one of my harvests from the allotment plot, complete with multicoloured carrots.
As you can see, they are all different sizes – growing your own carrots is not an exact science, many factors can affect their growth. The smaller carrots actually tasted better than the larger ones, so it’s not a disaster if yours don’t look like the carrots sold in the supermarket.
As with all home-grown vegetables, they will look different to crops grown by farmers in bulk, but they will be so much better because you grew them!
I hope you found this post helpful – if you did please leave me a comment below and visit my instagram page and Youtube channel where you can see more of what I’ve been up to.
Let me know if you’re growing carrots at the moment and how it’s going, I would love to know!
This post may contain affiliate links. If you click one and make a purchase, I may receive a small commission. This will be at no additional cost to you. You can read our disclosure policy here.