Hi and welcome if you’ve not visited my blog before. Today, I wanted to share with you something that I’ve been doing recently, and that is building my vegetable structures.
If you prefer to watch rather than read, I show how I built these vegetable structures in my YouTube Video Here.
I’m currently renting a house with a long-neglected garden and I’m trying to bring it back to life. For me, that involves getting as many vegetables as possible into the spaces I have to grow in.
Vertical gardening is a popular method, by which you can grow more produce in a smaller space by ‘encouraging’ plants to grow upwards rather than spreading out across the ground.
In order to do this, you need something for your plants to cling onto or wind around so that they are supported when they grow heavy – hopefully with tasty fruit and vegetables.
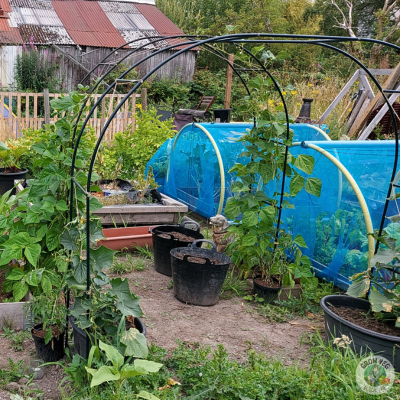
Yes, you can buy structures online that are ready-made, like these arches. I used these at my allotment plot; they were excellent and looked fantastic.
But you can also have budget-friendly or more natural-looking trellises and frames that you can easily construct yourself. Trust me- if I can do it then you definitely can!
How to Build Vegetable Structures:
Firstly, my recommendation would be to always use what you have. It saves you money plus it’s better for the environment to reuse something rather than it going into landfill.
I had a few canes lying around which definitely came in handy, but I didn’t have enough so I bought a few more. I was a little thrifty though, because I found that the shorter canes were much cheaper to buy than longer ones. I chose to spend less even though I created a little more work for myself!
1. Choose the Right Structures For Your Space:
This is so important, but I understand that it’s easy to get carried away when you’re planning your garden or plot.
An allotment plot generally gives you more space to play with. But not everyone has room for big arches.
Another point to think about is not only the size of your structure on its own, but how big it’s going to be when it’s covered in plants. Your lovely trellis may well fit into your space, but will be much larger when covered in leaves and bearing produce!
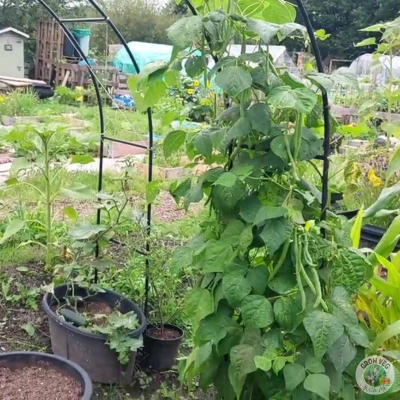
You can see from the photos that my climbing beans not only grew high up onto the arch, but they grew quite wide and spread outwards too.
Think about whether you can harvest your produce when the plant is full. You may need to get around all sides of your structure and if you’ve put it too close to say, a fence, you’ll struggle to harvest and may even get stuck! (Yes, I’ve done that!)
For a new gardener, it can be quite daunting because you also need to think about the weight of your plants when they bear fruit. My arches at the plot were fine because they were strong enough to hold heavy plants.
I grew my peas up some small teepees and they worked a treat, but they would have been far too flimsy for cucumbers.
They are big plants and the fruit is much heavier than a few pea pods!
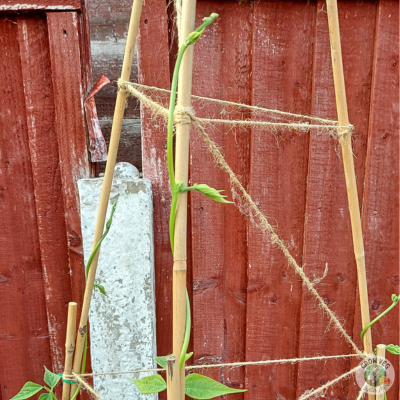
Finally, you need a structure that will work with the way your plants want to grow. For example: beans like to wrap themselves around their structure in an anti-clockwise direction (see photo).
In this case, vertical structures work best for me. The arch at my plot had vertical strings attached to each cross bar to help the twisting bean plants climb up.
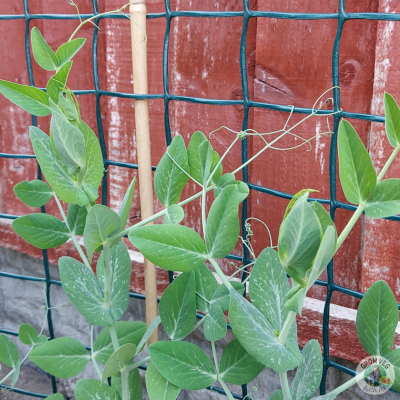
Peas grow tendrils that will grab onto a structure to help it climb upwards rather than twisting around.
I like to use square trellising for this because there are plenty of places for the plants to grab on and secure themselves.
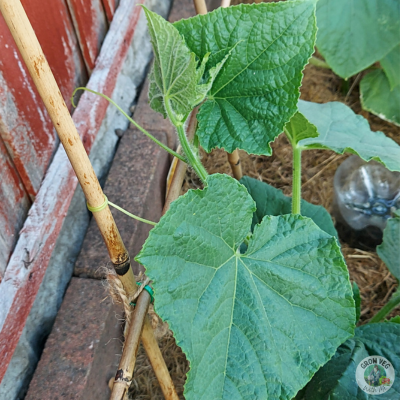
Cucumbers need a stronger structure and it needs to be wider because they spread outwards as well as climbing upwards.
Tendrils will wrap around the structure to help the plant to climb upwards. You’ll notice their tendrils are much thicker than those on pea plants.
I like to use a square trellis, as I do with the peas, but on a larger and sturdier scale.
Don’t forget to record your sowing and planting out in a garden planner like this one (designed by me!) which also has a journal section to keep all of your gardening information together:
Unfortunately, I just don’t have room for arches in my garden, so I had to build my own structures to fit the space I have to work with.
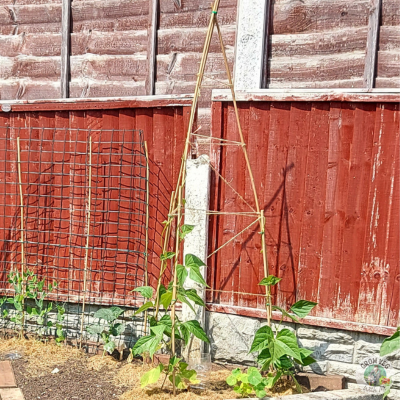
My climbing beans (I’m growing cobra variety) need a high structure – higher than the canes I have. That meant I had to improvise!
I used garden cable ties, which made the process so much quicker and easier than using string.
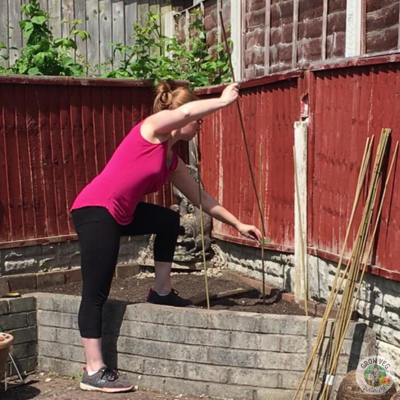
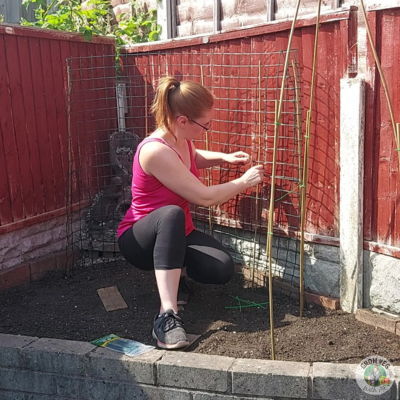
I started by putting three canes an equal distance apart in the bed and pushing them deep into the ground for stability. Then, I joined a cable tie to form a loop and hooked it over one of the canes.
I used a new cane to slide into the loop, joining the two canes together and tightened it up until they stayed in place.
I did this for the other two stability canes and I was left with three long pieces pointing upwards.
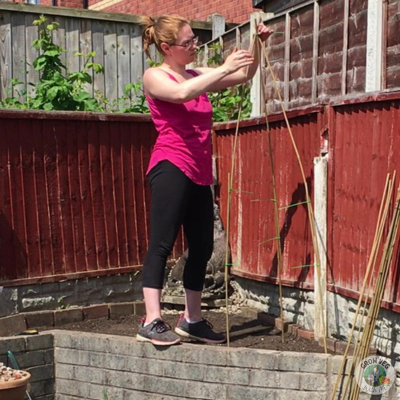
Climbing onto the bed (being careful not to fall!), I held the tops of the three canes together by crossing them over each other and used cable ties to secure them in place.
Now the top canes bent over to form a tripod structure. After much fiddling to get each leg at the right angle and the right length, I tightened up all the cable ties, before snipping the loose ends off.
Lastly, I tied some string around the structure to give the bean plants more stability as they grow bushier.
This structure isn’t as tall as I would have liked, but I had to ft it into the space, so when the growing tip of the plant reaches the very top, I will cut it off (This is called topping or pinching out).
Pinching out the tip will stop the plant from growing any taller, but will encourage more side shoots to grow and hopefully, more beans.
3. Building a Pea Trellis Structure:
My pea plants aren’t going to grow as tall as the climbing beans, so I don’t need something very high.
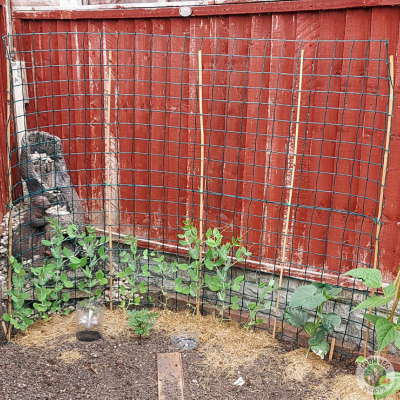
Square mesh is perfect for peas because it provides lots of little ‘hand holds’ for the plant’s tendrils to connect to.
Again, I needed to improvise as the mesh I had wasn’t high enough and I wanted it to be standing freely and stable. This mesh is usually attached to a fence but I didn’t want to do that.
Once I had cut two lengths of the mesh to the width I needed, I used a cane to thread through the squares at one end, before pushing it into the ground.
I continued to weave the canes through the mesh at intervals until I had a stable structure.
Next, I lined up the second piece of mesh with the first so that I could weave the canes through it until it met the first piece.
I used cable ties to join the mesh together so there were no gaps and the mesh didn’t move. Chopping off the ends of the cable ties finished the trellis, ensuring there was nothing for me to get snagged on.
When the pea seedlings are planted out, they should start to find their own way onto the netting. If they aren’t holding on, you may need to tie them to the mesh with some string to help them along.
Cucumbers don’t need a really high trellis either – in fact, they don’t need to climb up at all. They can grow along the ground, but I don’t have enough space for them to do that!
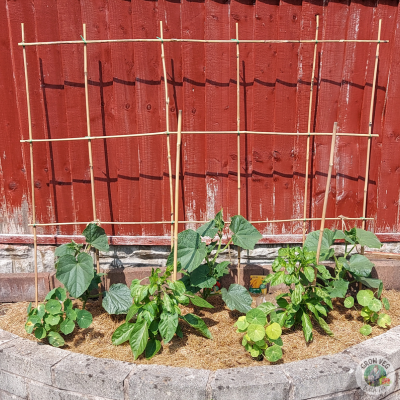
My sweet peppers were already planted into the bed I wanted to use, so my cucumbers needed to grow vertically behind them.
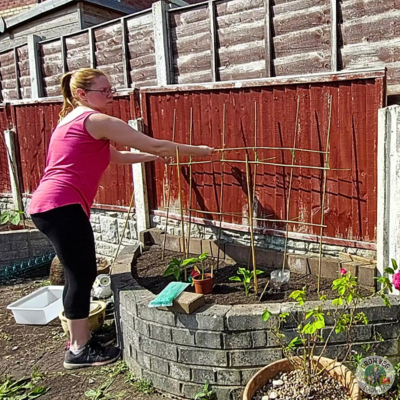
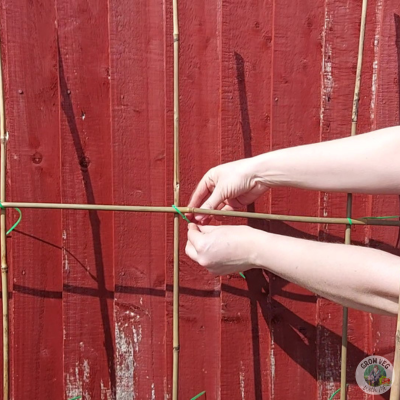
I started by placing six canes, equal distance apart, vertically into the bed, slightly angled towards the fence.
Then I pushed them down until they were stable and placed a cable tie loop around each one.
Taking my cross cane, I carefully pushed it through each loop, from right to left until the cane was all the way across. I then pushed it upwards to where I was happy with it, before tightening the cable ties.
I repeated this process for all of the cross canes until they had reached the top of the vertical canes.
As the plants grow taller, they should grab onto the canes, but I like to give them some help by tying them in with some string to guide them.
So, that’s how you can build some different structures for your vegetables. Not only will you keep them sturdy but you can fit more into your space by growing vertically!
I hope you found this post helpful – if you did please leave me a comment below and visit my instagram page and Youtube channel where you can see more of what I’ve been up to.
This post may contain affiliate links. If you click one and make a purchase, I may receive a small commission. This will be at no additional cost to you. You can read our disclosure policy here.