There’s really no taste quite like peas straight from the pod, especially when you’ve picked them from your own plant. They taste so fresh and nothing like frozen peas from the supermarket.
There are three different types of peas:
First earlies (harvest at around 12 weeks)
Second earlies (harvest at around 13-14 weeks)
Maincrops (harvest at around 14-16 weeks)
They can all be sown from March to June but take different lengths of time to be mature enough to harvest.
There are so many different varieties available other than the standard green ones. Some have purple or yellow pods and the plants produce the most beautiful pink or blue flowers instead of the white ones on traditional green podded pea plants.
Height is another variable when it comes to peas – there are dwarf varieties that can grow up to around 18 inches tall but some can grow up to 6ft so the type you choose needs to fit in with your growing space.
Mangetout are picked before the peas develop so that the pods can be eaten (they are amazing in a stir fry).
Sugar snap peas are usually harvested when the peas are very small, and the whole pod (including the peas) can be eaten. You can also let the peas grow bigger, but the pods will become thicker and lose some of their taste the bigger the peas get.
Garden peas (shelling peas) are to be eaten from the pod when the peas are mature, discarding the pod.
Marrowfat peas are dried when they are fully grown and used in cooking stews and soups etc.
You could also grow pea shoots for salads, which are harvested before any pods form, when the shoots are between 4-6 inches tall (around 3-4 weeks after sowing).
Before buying any seeds, always check the packet information for these details and if you decide to buy plug plants instead of growing from seed, read the label!
How to Grow Your Own Peas:
So where do you start?
1. Plan Your Growing Space
Your preparation will depend on whether you are growing your peas in the ground or in containers.
If growing in the ground, the area will need to be weeded and have some well rotted manure mixed into it as early as the previous autumn, but it can be done as late as a few weeks before.
Peas grow best in a soil which is neutral or slightly alkaline. a PH Tester is great tool to find out how acidic your soil is and if yours is too acidic, you can add some lime into it to get the right balance.
Container grown peas will grow well in multipurpose compost, so this method would suit beginners.
2. Sow Your Peas
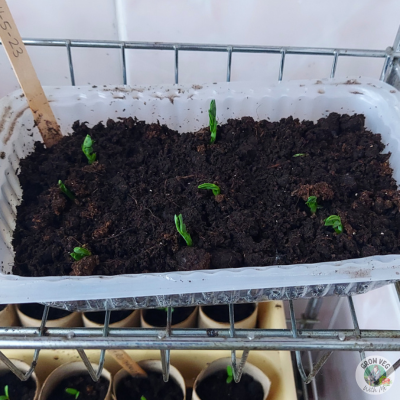
Sowing indoors in February or March has many benefits. Your pea plants will germinate faster because they don’t like the cold and could rot if you plant them directly outside.
I prefer this method because when I’ve tried to sow peas directly outside, only around half germinated. Some didn’t even get a chance to grow because they were eaten by mice and other critters, and the ones that did were attacked by slugs, snails or pigeons.
You can buy seed trays but I like to recycle my plastic containers by using them as seed trays but cardboard tubes from toilet or kitchen rolls are also very good for sowing peas into.
They should be placed around 5cm deep into multipurpose compost. You can also sow peas into some guttering filled with compost, which can then easily slide out into your growing space when they’ve grown big enough.
If you do decide to sow directly outside, ensure that your soil is at least 10 degrees Celsius or 50 degrees Fahrenheit so the seeds are warm enough to germinate. You can speed this process up by using a heated propagator, placing cloches or plastic sheeting over your growing area a few days before sowing and then protecting the seeds with cloches or fleece after sowing.
Follow the packet instructions for spacing when sowing directly, as taller varieties will need more space to allow for good air flow between them. Place the seeds into trenches, allowing room for the supports the plants will need to grow up.
To ensure you have a long growing season and constant harvests it is a good idea to sow an early and maincrop variety because they have different harvest dates.
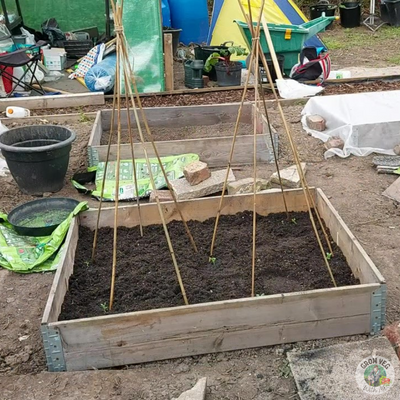
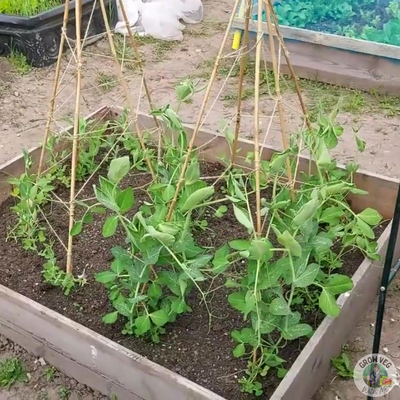
3. Support Structure
It doesn’t have to be anything fancy or expensive, but your peas will need support as they grow or they will just flop all over the place and won’t have enough air circulation to produce a good harvest.
I made teepees from some thin canes for my structures as I only grew shorter varieties, but if you want to grow taller plants, they will probably need something stronger and taller.
Peas will grow up a fence or trellis or you can build a frame for them instead, give it a go and see what works for you. Chicken wire can also be used to strengthen cane structures.
I love seeing the different structures people make for their climbing vegetables, in fact I have a Pinterest Board dedicated to it – you can see it here if you want to find some ideas for your supports. Follow me to see more ideas
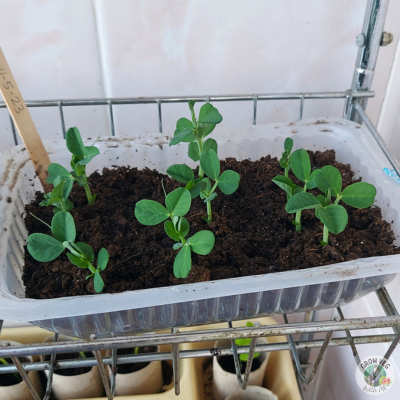
4. Plant out Seedlings
When your seedlings (or plug plants) reach around 10 inches tall, they can be planted outside, where you should now have your structure waiting for them. Don’t worry if you don’t, you can always place one around the seedlings while they are small.
Before you put them into the soil or compost, they need to be hardened off so that they can survive outside after being used to warmer conditions.
Cloches can be used to do this – place the plants under one or in a cold frame for a week. After this, plant them in their final spot and if it’s still a little cold, cover them in some fleece to protect them from lower night temperatures for a few days.
If you are using guttering, you should be able to slide your plants out, straight into their trench. Make sure to water them well.
Make sure to log your sowing and planting out in a planner like this one, designed by me!
They are available to buy on Amazon, click below to see the whole range:
Your pea plants should now grow taller and stronger without much help from you.
There is no need to give them much water (unless conditions are very dry) until they start flowering. When this happens they will need a good drink to help the pods develop. Repeat the watering in another two weeks to help the peas begin to fill the pods.
A useful tool to have is a moisture meter which will show you how wet the soil is close to the roots of your plants. It will help you determine whether to water or not and I swear by mine because some plants really don’t like to be too wet – peas included.
Adding a layer of mulch (there are various types, e.g. garden compost or straw) around your plants can help to keep moisture in the soil, especially during dry spells and hot weather.
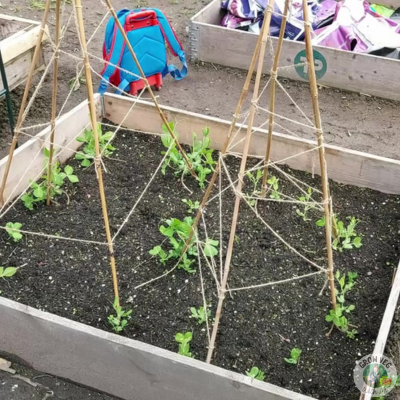
You will notice tendrills wrapping themselves around your structure, keeping the plants supported.
You may want to tie them to it with some string to get them started and to avoid them clumping together in the same area.
This should stop any ‘damping off’ because of poor air circulation.
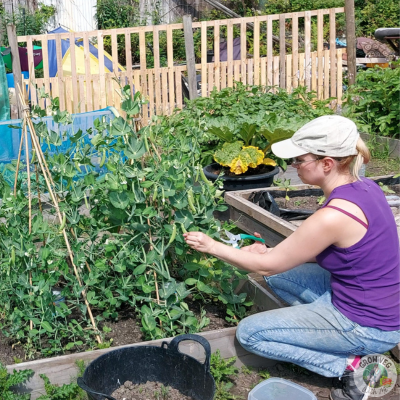
6. Harvesting
Sugar snap peas and mangetout should be ready when the peas are only just starting to develop, usually when the pods reach around 3 inches long.
Shelling or garden peas are ready when the pods are full, it is easy to tell by looking at them.
Pods will mature from the lower parts of the plant first so it is best to start from the bottom and work your way upwards when harvesting.
I would recommend taking all of the pods that are ready at once instead of leaving them on the plant because the more you pick, the more pods will grow. If you don’t pick them, the plant will stop producing altogether.
Too many peas? These can be frozen if you can’t use them all soon after picking.
You can also take some of the new shoots from the top of the plant to eat in salads (they taste like peas and are delicious too).
Peas can be harvested from June all the way through until October if you grew an early and a maincrop variety.
Your plants will start to slow down towards the end of their life, producing less flowers and pods and they can be composted.
I want to wish you good luck but I’m sure you won’t need it. If you follow the advice in this post, soon you will be enjoying the best peas you’ve ever tasted!
I hope you found this post helpful – if you did please leave me a comment below and visit my instagram page and Youtube channel where you can see more of what I’ve been up to.
This post may contain affiliate links. If you click one and make a purchase, I may receive a small commission. This will be at no additional cost to you. You can read our disclosure policy here.